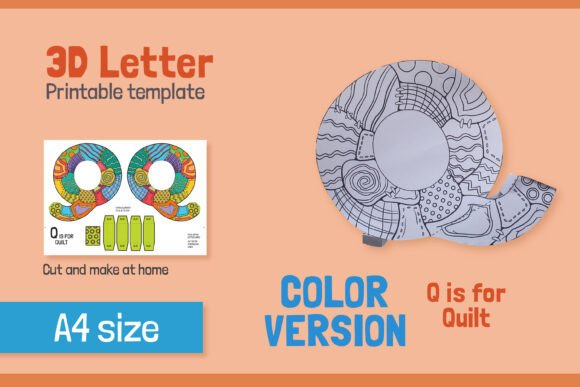
Mastering the Letter Q 3D Papercraft for Kids – COLOR: A Guide to Better Crafting
Bringing learning to life requires more than just pointing at a flashcard. It demands engagement, tactile interaction, and a bit of creative flair. This is where the Letter Q 3D Papercraft for Kids – COLOR shines. Designed specifically to help children associate the letter Q with the word "Quilt," this vibrant resource transforms abstract alphabet recognition into a hands-on construction project. However, many educators and parents dive into papercraft activities without fully understanding how to maximize their educational value or avoid common pitfalls that lead to frustration rather than fun.
If you have ever watched a child struggle with a glue stick while paper tears, or seen a finished craft collapse under its own weight, you know that preparation is key. This guide explores how to effectively use this specific 3D alphabet tool, highlighting common mistakes and offering practical solutions to ensure a smooth, educational, and enjoyable experience for kids aged preschool through early elementary.
Understanding the Value of 3D Alphabet Construction
The Letter Q 3D Papercraft for Kids – COLOR is not merely a coloring sheet. It is a structural engineering challenge scaled down for small hands. By cutting, folding, and gluing the pieces to form a three-dimensional letter, children develop critical fine motor skills and spatial awareness. Unlike flat worksheets, a 3D model requires the child to visualize how two-dimensional shapes connect to create volume. This cognitive leap is significant for early literacy and mathematical thinking.
Furthermore, the association with "Quilt" provides a thematic anchor. When children build the letter, they are not just memorizing a shape; they are engaging with a concept. The color version adds an extra layer of decision-making and aesthetic appreciation, allowing kids to see the immediate impact of their work without the fatigue of coloring every single panel from scratch.
Common Mistakes and How to Avoid Them
Even with high-quality resources like the provided JPEG and PDF files, results can vary wildly based on execution. Here are the most frequent errors adults make when facilitating these projects, and how to correct them.
Ignoring Paper Weight and Quality
The most common mistake is printing the template on standard copy paper. While the file is provided at a crisp 300 dpi, standard 20lb bond paper is often too flimsy for structural integrity. When children fold thin paper repeatedly, the fibers break, leading to weak joints. The resulting "Q" may look crumpled rather than crisp.
The Fix: Always use cardstock or heavy-weight paper (at least 65lb cover). If you only have standard paper, consider gluing the printed template onto a cereal box or cardboard before cutting. This simple step dramatically improves the durability and professional look of the final craft.
Skipping the Video Tutorial
The package includes a PDF with a link to a video assembly guide. Many users overlook this resource, assuming they can figure out the folds intuitively. Papercraft tabs and tuck-ins can be counterintuitive. Guessing the fold direction often leads to the letter assembling inside-out or having visible glue tabs on the exterior, which detracts from the visual appeal.
The Fix: Watch the linked video yourself before handing the materials to the child. Identify the tricky folds—usually where the curve of the Q meets the tail—and pre-score these lines if necessary. Being prepared allows you to guide the child proactively rather than reactively fixing mistakes.
Rushing the Drying Process
In a classroom setting or busy home environment, there is pressure to move quickly. Children often press glued tabs together and immediately try to stand the letter up. Wet glue slips, causing the structure to lean or fall apart. This leads to disappointment and a perception that the craft is "too hard."
The Fix: Use quick-drying craft glue or double-sided tape for older children. For younger kids using white glue, implement a "holding pattern." Have them count to ten while holding the tab in place, or use clothespins to clamp sections while they dry. Patience here ensures a sturdy final product that can be displayed with pride.
Maximizing Educational Impact
To get the most out of the Letter Q 3D Papercraft for Kids – COLOR, integrate it into a broader lesson plan. Do not treat it as an isolated activity. Use the construction time to discuss the sound of the letter Q, other words that start with Q, and the texture of real quilts. Ask questions like, "Why do we need to fold this tab?" to encourage problem-solving dialogue.
Additionally, consider the environment. Ensure each child has enough workspace. Crowded tables lead to accidental bumps and torn paper. Provide scrap paper for testing glue amounts, teaching children that less is often more when it comes to adhesion.
What to Check Before You Begin
Before printing your A4 page, verify your printer settings. Ensure the scale is set to 100% or "Actual Size." Printing at "Fit to Page" can shrink the template, making the tabs too small for little fingers to manipulate effectively. Also, check that your color ink levels are sufficient; faded prints can make it difficult for children to distinguish between cut lines and fold lines.
Finally, assess the skill level of your group. If working with very young children, you may need to pre-cut the outer silhouette, leaving only the internal folds and glue tabs for them to manage. This modification maintains the educational benefit of folding and assembling while reducing the frustration risk associated with complex scissor work.
By avoiding these common pitfalls and preparing adequately, you transform a simple download into a powerful learning tool. The Letter Q 3D Papercraft for Kids – COLOR becomes more than just a decoration; it becomes a testament to patience, precision, and creative learning. Whether you are decorating a classroom wall or building a home library display, taking the time to do it right ensures the final quilt-themed letter stands tall and bright.